GhostNet 1.5, page 29
GhostNet Guide
S2 Underground field guide: GhostNet Guide
Version 1.5 — Stopgap Comms Solutions (CC BY-NC-SA 4.0)
Searchable page text (OCR / PDF)
29
Ion2G Setup and Configuration
Standard Config Works
As you install Ion2G ALE, the base configuration works fine to make contacts. However, you will need to
check a few settings to make sure everyone is on the same page.
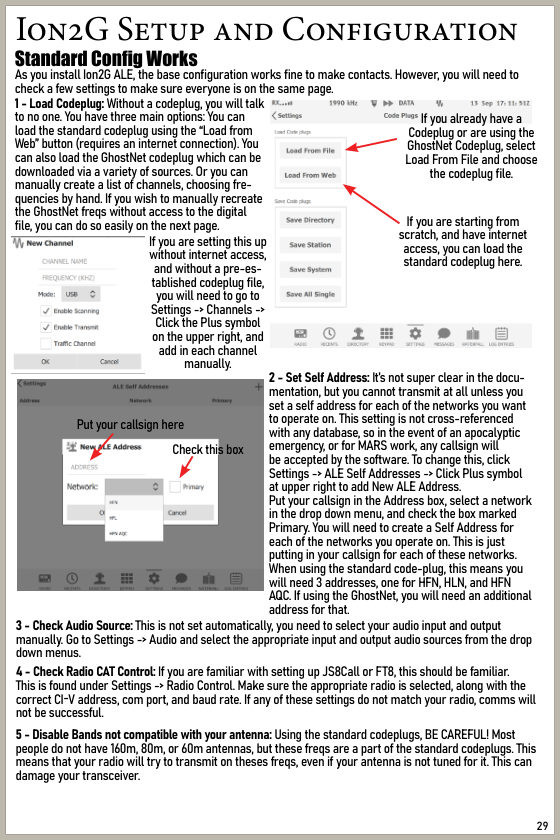
2 - Set Self Address: It’s not super clear in the docu-
mentation, but you cannot transmit at all unless you
set a self address for each of the networks you want
to operate on. This setting is not cross-referenced
with any database, so in the event of an apocalyptic
emergency, or for MARS work, any callsign will
be accepted by the software. To change this, click
Settings -> ALE Self Addresses -> Click Plus symbol
at upper right to add New ALE Address.
Put your callsign in the Address box, select a network
in the drop down menu, and check the box marked
Primary. You will need to create a Self Address for
each of the networks you operate on. This is just
putting in your callsign for each of these networks.
When using the standard code-plug, this means you
will need 3 addresses, one for HFN, HLN, and HFN
AQC. If using the GhostNet, you will need an additional
address for that.
3 - Check Audio Source: This is not set automatically, you need to select your audio input and output
manually. Go to Settings -> Audio and select the appropriate input and output audio sources from the drop
down menus.
4 - Check Radio CAT Control: If you are familiar with setting up JS8Call or FT8, this should be familiar.
This is found under Settings -> Radio Control. Make sure the appropriate radio is selected, along with the
correct CI-V address, com port, and baud rate. If any of these settings do not match your radio, comms will
not be successful.
1 - Load Codeplug: Without a codeplug, you will talk
to no one. You have three main options: You can
load the standard codeplug using the “Load from
Web” button (requires an internet connection). You
can also load the GhostNet codeplug which can be
downloaded via a variety of sources. Or you can
manually create a list of channels, choosing fre-
quencies by hand. If you wish to manually recreate
the GhostNet freqs without access to the digital
file, you can do so easily on the next page.
If you already have a
Codeplug or are using the
GhostNet Codeplug, select
Load From File and choose
the codeplug file.
If you are starting from
scratch, and have internet
access, you can load the
standard codeplug here.
If you are setting this up
without internet access,
and without a pre-es-
tablished codeplug file,
you will need to go to
Settings -> Channels ->
Click the Plus symbol
on the upper right, and
add in each channel
manually.
Put your callsign here
Check this box
5 - Disable Bands not compatible with your antenna: Using the standard codeplugs, BE CAREFUL! Most
people do not have 160m, 80m, or 60m antennas, but these freqs are a part of the standard codeplugs. This
means that your radio will try to transmit on theses freqs, even if your antenna is not tuned for it. This can
damage your transceiver.